Don’s Harman/Kardon 330B
Refurbishing a beloved 45-year-old stereo receiver

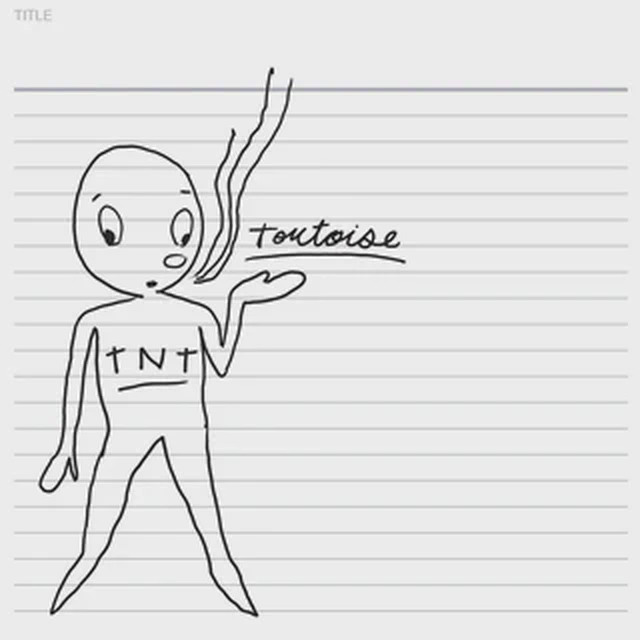
I remember my first encounter with it, back in 1998. I was clearing out my inbox and I had put on some background music to work to. It didn’t take long for the music to cut through everything I was doing and reach into my soul. I closed my laptop lid, sat on the carpet, put my ear right up to the speaker. It was like listening to music for the first time. I heard detail and warmth I’d never been aware of before. I sat cross-legged, closed my eyes, and took it in.
The album was TNT by Tortoise. I’d heard it a hundred times before, while studying at school back in Cleveland. But here in Don’s attic office—in the Bermans’ rambling, century-old house in Boston where I was staying for the summer—it was totally fresh.
Don Berman’s receiver was a few years older than me. It was a Harman/Kardon 330B, manufactured in Taiwan in 1975, with a wooden case. The speakers were designed and built by Advent, right across the river in Cambridge.
The 330B was marketed as a modest home stereo (or, as the manual calls it, a “stereophonic music center”). It’s not rare or particularly sought-after. At 20 watts per channel, it’s far from being a powerhouse. No matter. I loved the sound of it.

Donald H. Berman
Don was the father of my college roommates Ben and Steve Berman. He was a law professor at Northeastern, focused on computer science and law. He was one of those amazing professors everyone remembers and shares stories about. I met him once at the beginning of my freshman year, and, sadly, he passed away a few months later. I never got to know him. Still, I pictured him up here in the attic reading papers and doing research, and I wondered what he listened to on this stereo.
A couple years later, I moved to Boston after graduation. Once I settled into my first job and apartment, I knew I had to have the 330B. No one else had any interest in it, so I traded Steve something for it—I can’t remember what.
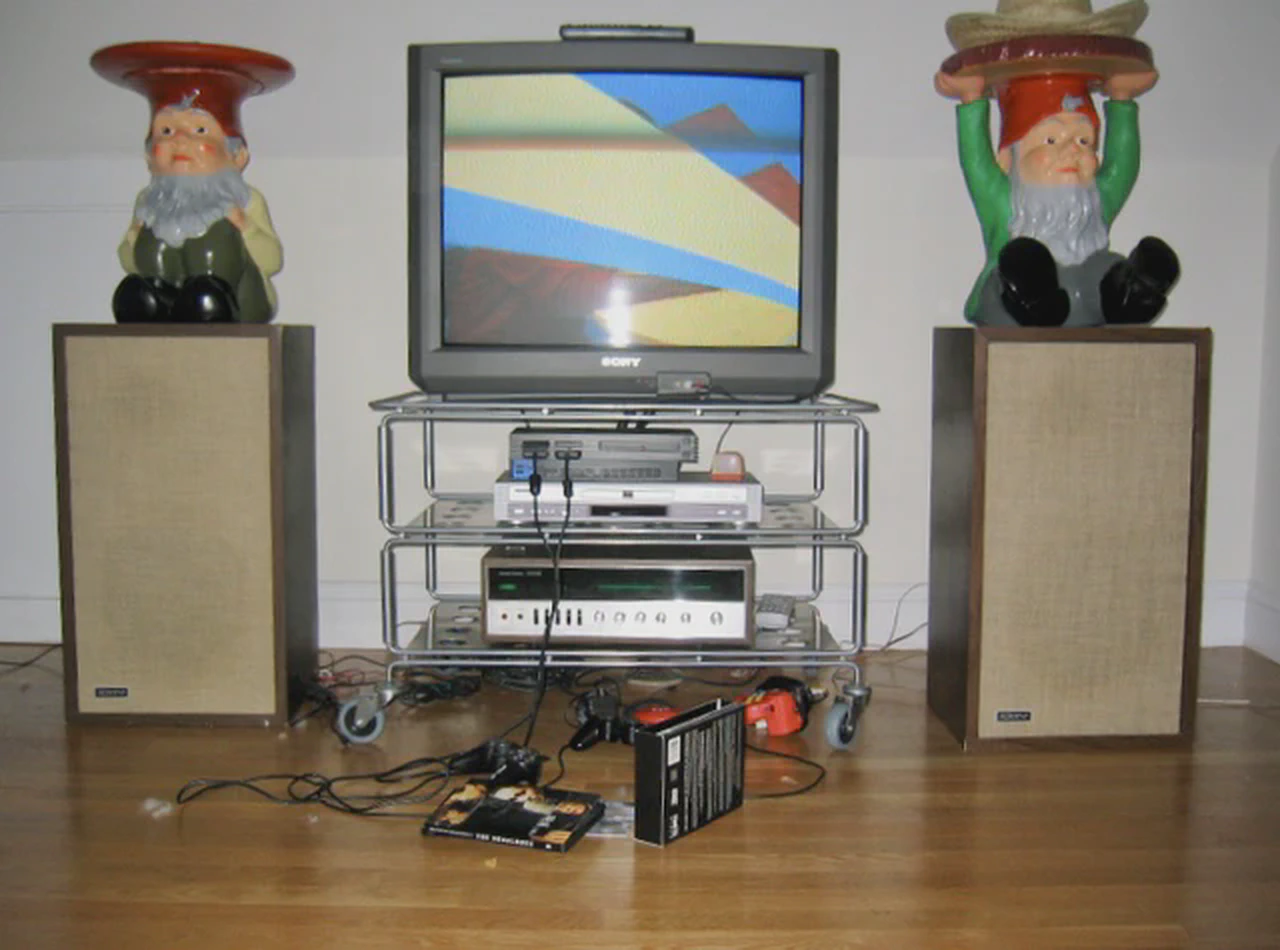
It was probably my first possession—other than my mattress—that weighed more than 10 pounds. I moved the system into my new apartment, picked up some gnomes to go with it, and hooked it up to my roommate’s TV:
One day I got curious and took the grills off of the speaker cabinets. I discovered that the foam around the speaker cones had completely dried out and crumbled. I took the speakers to a local audio repair shop, who offered to re-cone the speakers with new foam. I don’t remember it sounding any better with new foam, but there was something spiritually important to me about taking care of this new possession. A small moment of adulting at a time when it was not clear to me that I was, in fact, an adult.
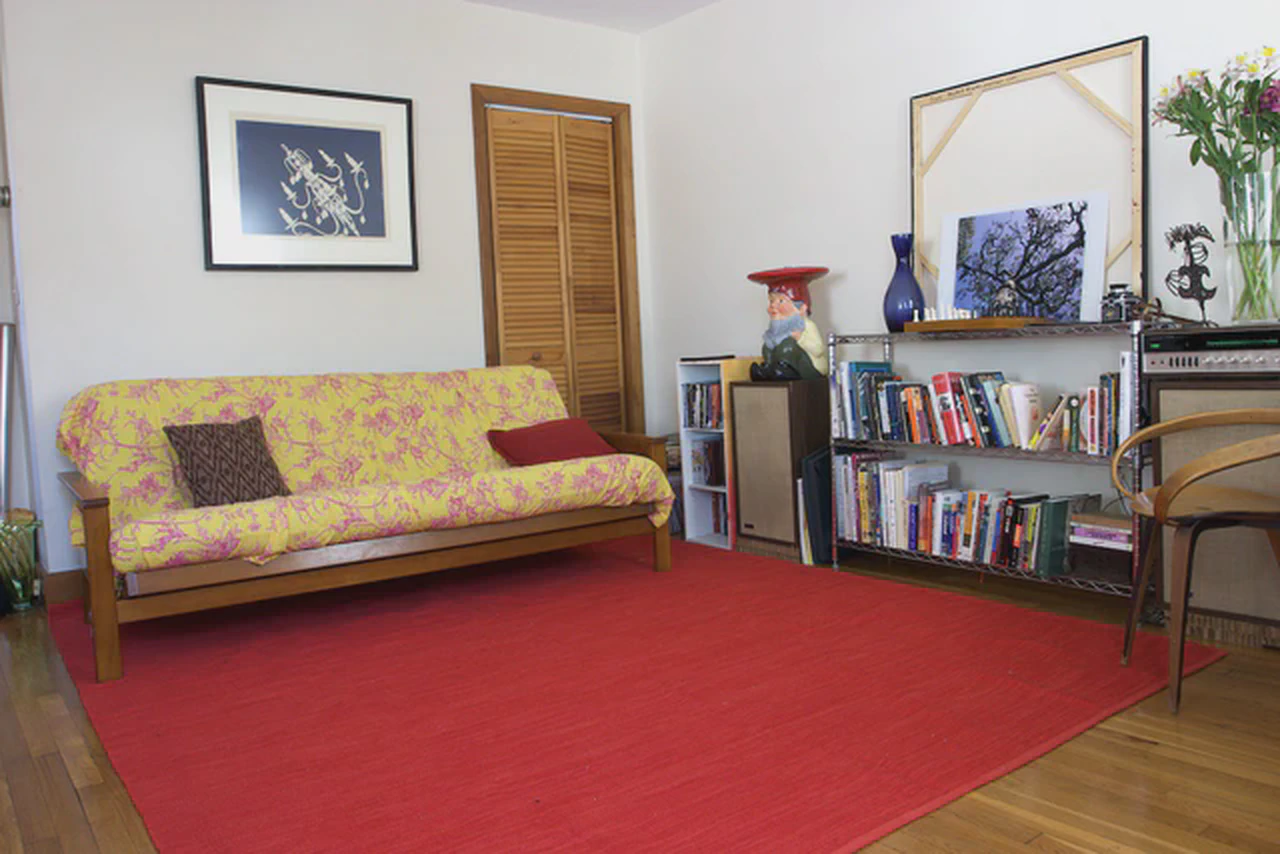
When I met my wife Siobhán in 2004 and we moved in together in Central Square, Cambridge, the 330B hung out in our living room.
Eventually we left Boston for New York City. We owned way too much stuff for NYC life, so I gave the system to her parents. It sat in the mud room of their farmhouse in Westmoreland, New Hampshire for a couple of years. Then it sat in an attic closet at their house in Raleigh, North Carolina.
Periodically her mom would call me to ask if I ever wanted it back. A few times she suggested she could just take it to Goodwill for me and I was like OMG DO NOT let it go! But in the back of my mind I wondered if I should just let it go. Would we ever be reunited? Does it really sound as good as I remember? There’s plenty of smaller, lighter, modern amplifiers and speakers that sound amazing.
We finally picked it up from her parents’ house in 2015 during the holidays and drove it to my parents house in Nashville. That’s as far as we could take it, because it was too bulky to fly back to San Francisco, where we now live, and too expensive to ship.
My parents connected it to a turntable and used it in their dining room. They liked to play the album Getz/Gilberto by Stan Getz & Joao Gilberto, and I noticed how well it rendered Astrud Gilberto’s voice. High vocals always sound so resonant.

Finally, last November we had the chance to bring it to San Francisco. Siobhán picked up the system and drove it out. We set it up in the living room, and it sounded pretty good, but not as good as I remembered. There was a hum on the right side that wasn’t there before.
Now 45 years old, Don’s receiver needed some work.
A receiver is a specialized piece of electronics. It takes a small (1 volt), “line-level” audio signal from, say, an iPhone or a record player, along with a giant, noisy 120-volt AC sine wave coming from the wall outlet, and it delivers a speaker-level signal that’s 10 volts or more, strong enough to move a speaker magnet enough to create waves of air pressure in the room that we call “beautiful music.”
As a programmer who has spent so long in the binary world of digital logic, I was excited by the idea of working on something analog. While digital signals are locked to zeroes and ones, analog signals are continuous and infinitely variable. I’d taken an electronics class in college, but that was 20 years ago and I hadn’t touched a soldering iron since.
I dug around on the internet and found the technical manual.
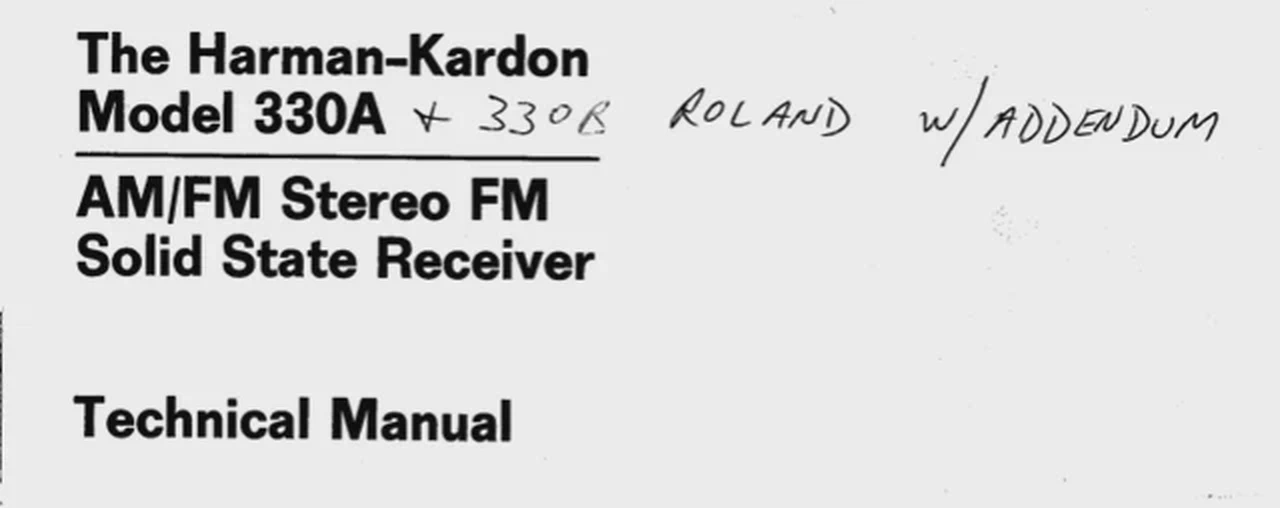
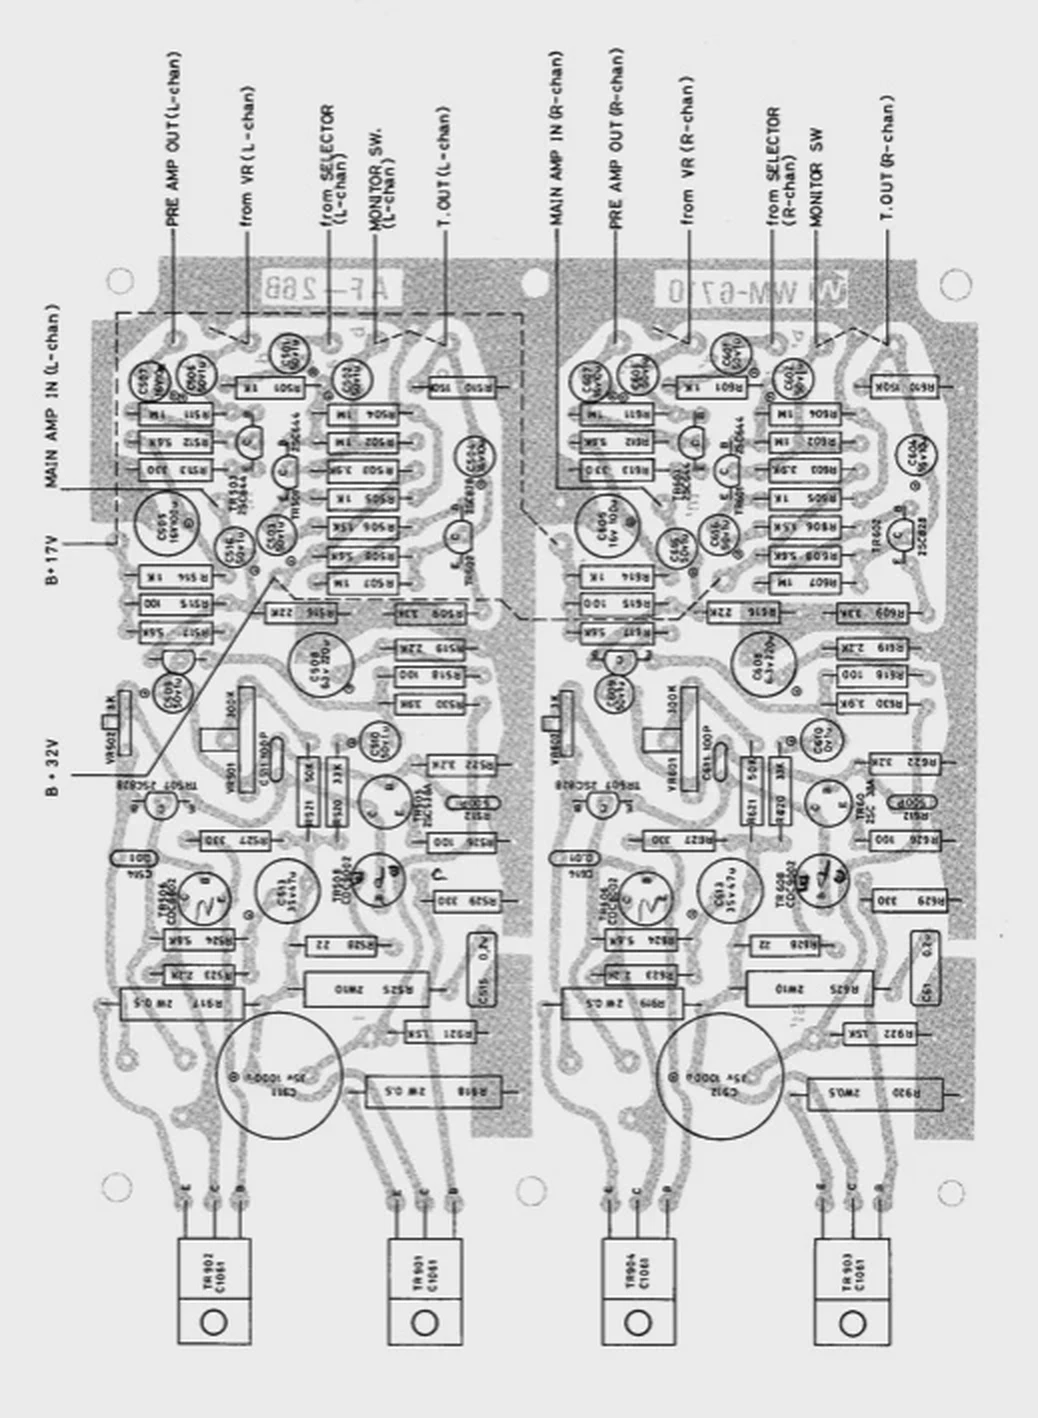
The 330B’s technical manual contains the schematic for the unit, diagrams of components, and instructions for how to calibrate the amp after making changes (a process known as “biasing”).
Electronics repair shops used to guard their collections of these manuals very closely, but now there’s a giant free database of PDFs for any piece of electronics.
I wanted to see how the schematic lined up to reality, so I popped open the cover. Someone had made repairs before, because a couple of the screws had signs of cam-out. It was surprisingly clean inside, though.
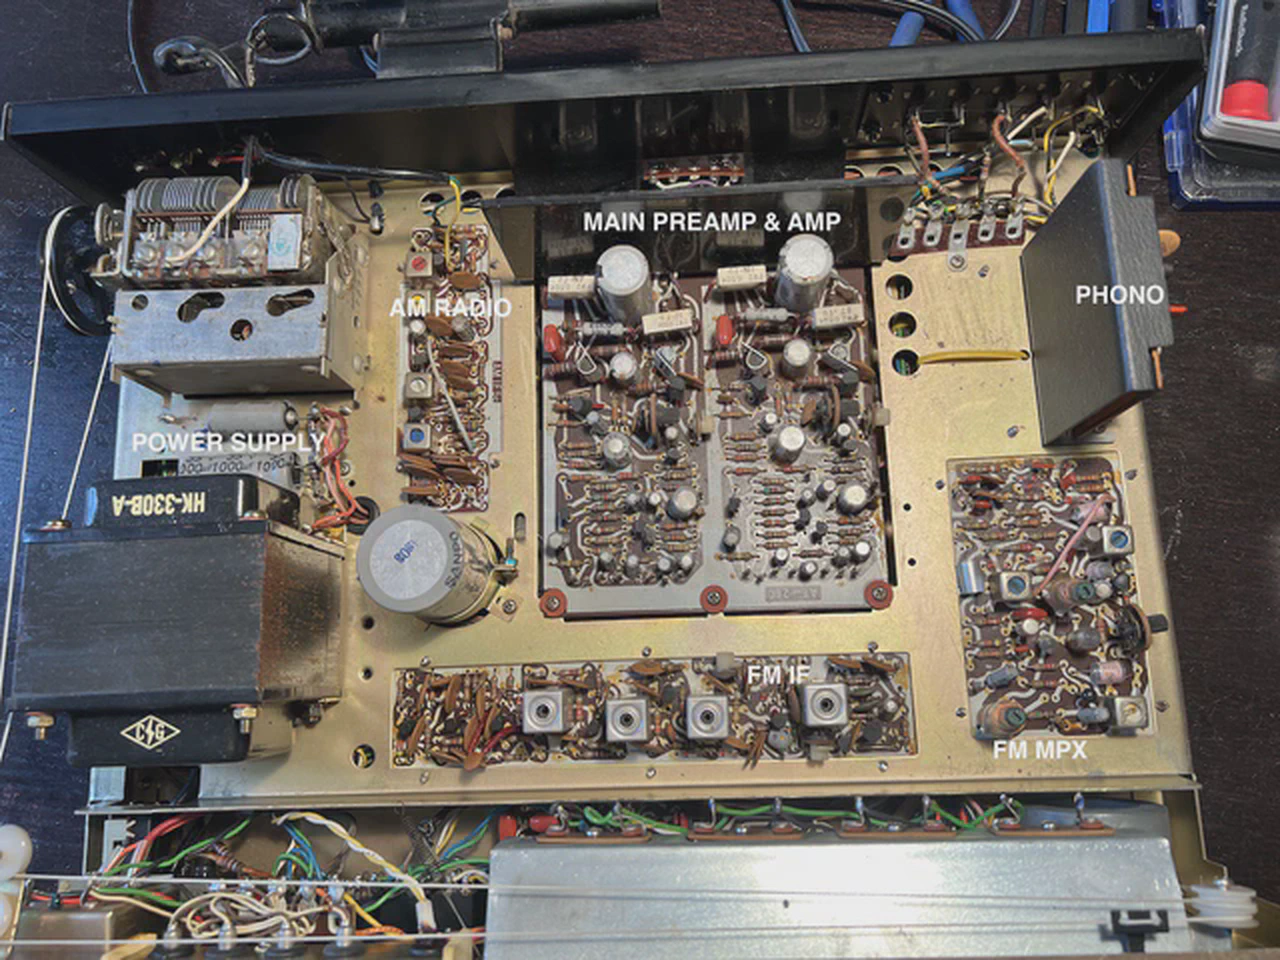
There are barely any markings or labels on anything. Modern PCBs are silkscreened with information about every component and its polarity. This 330B has none of that. Instead, the technical manual shows how the numbered components on each circuit board map to the schematic:
I removed the steel panel from the bottom of the unit, and what I saw was an intimidating mess of wires and solder paths:
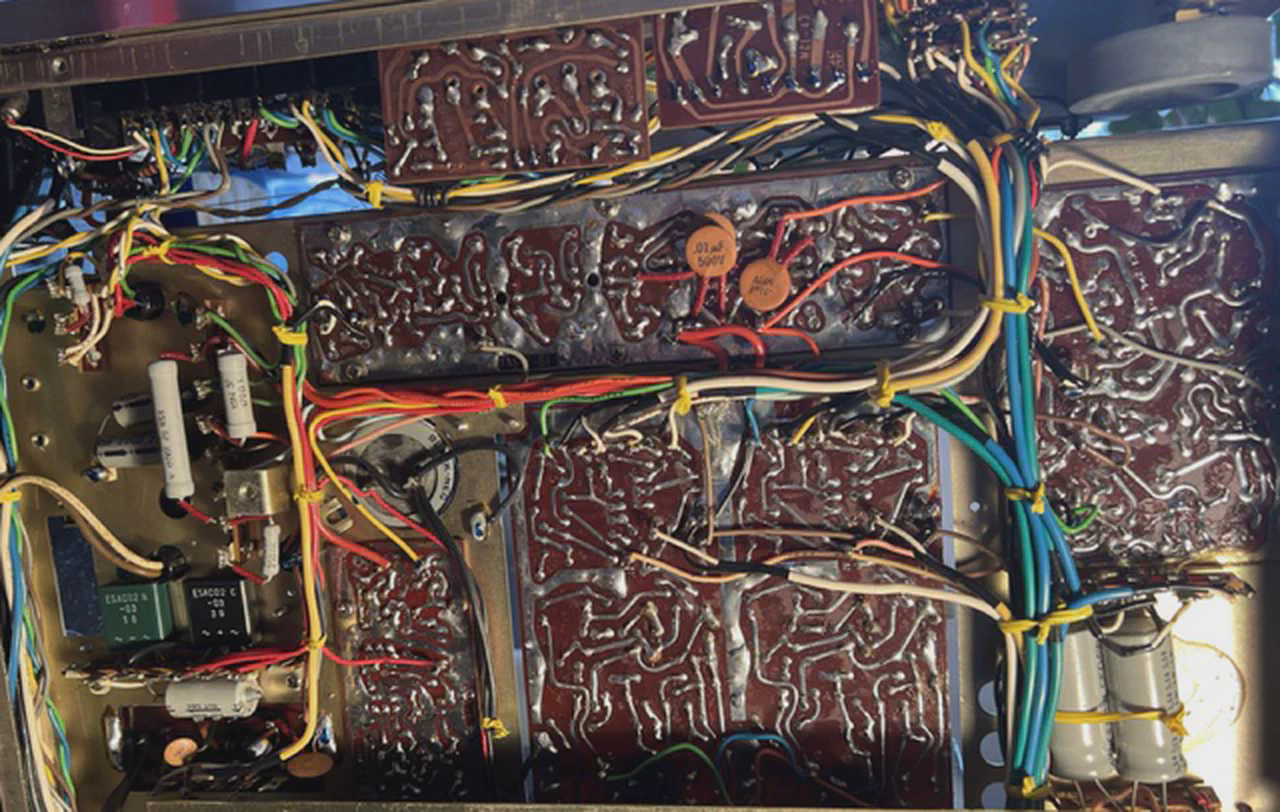
Seeing this, and the lack of markings, I knew I wasn’t ready. Not yet. I needed to relearn electronics basics. I needed practice. I closed up the case.
A couple weeks later I bought a $9.99 DIY electronics toy kit (”electronic dice” with two sets of 6 LEDs and a push button) and started soldering it together. I watched soldering videos. I watched desoldering videos. I learned that my soldering iron from college had a tip that had oxidized over time and was nearly unusable, so I bought a new tip for it. Then I kept getting cold solder joints with my old 30 watt student soldering iron. That led me to buying a new soldering station. One step at a time, I was getting geared up.
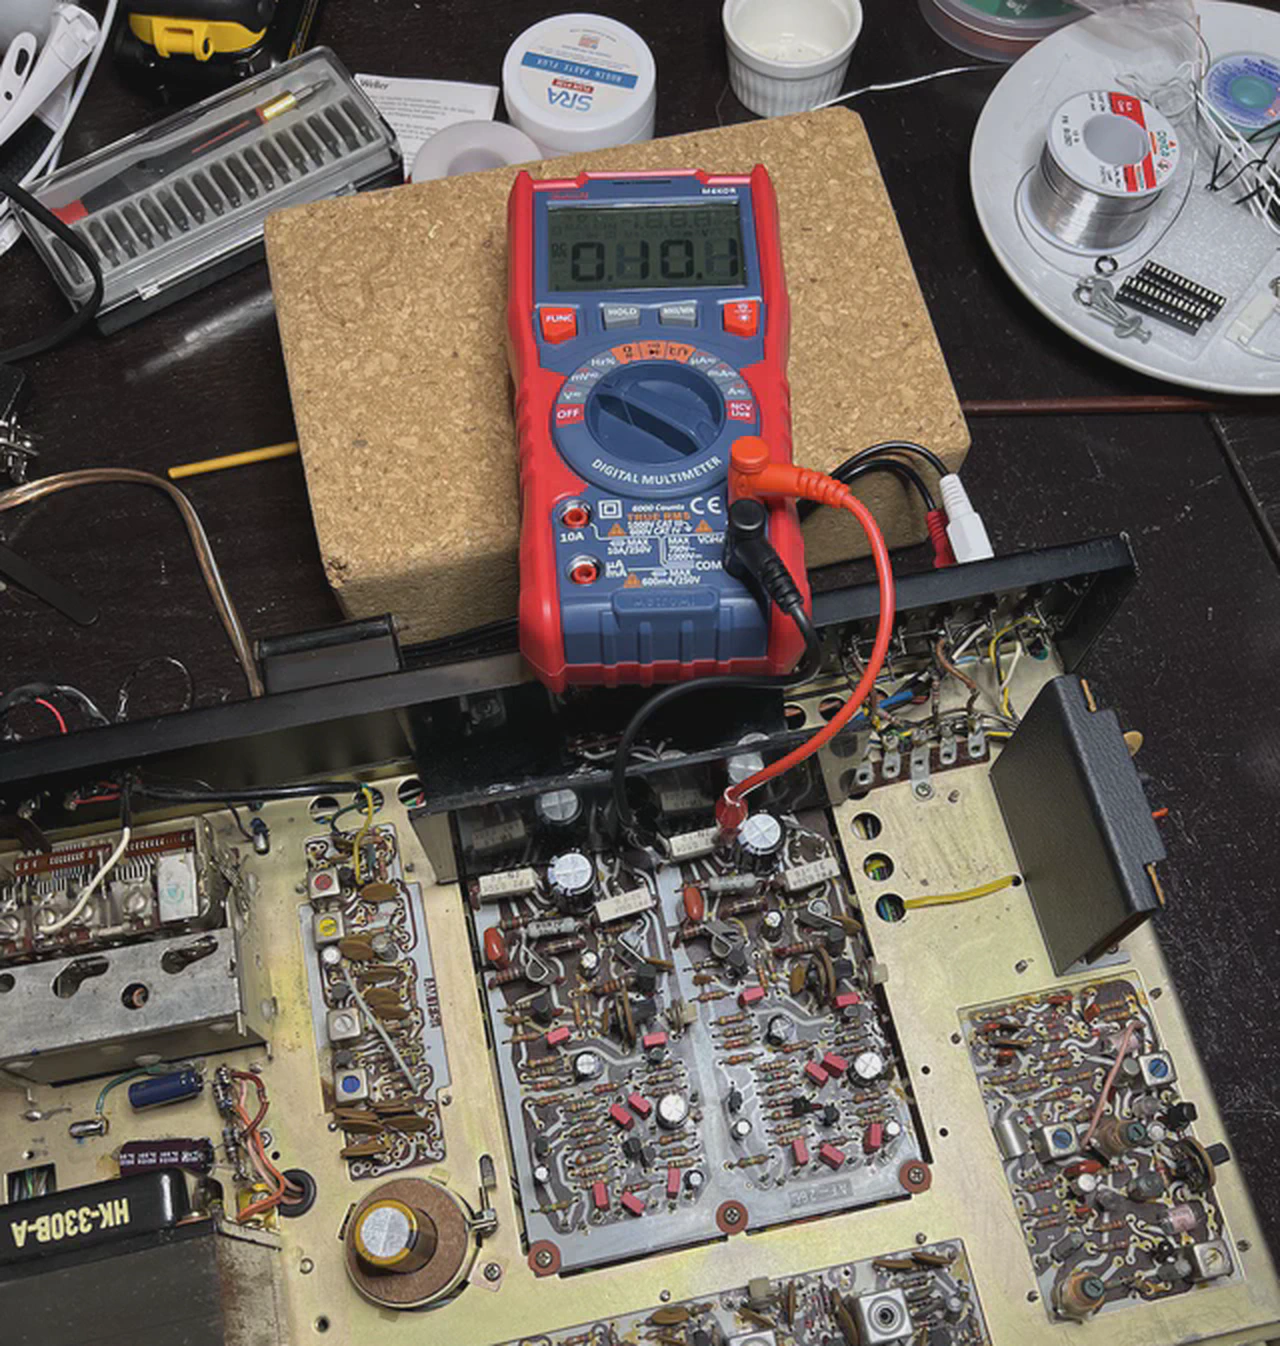
If you can handle the ego hit and set your expectations sufficiently low, it’s fun to be a beginner as an adult. I watched YouTube videos of amplifier repairs in my spare time. The videos are often long and tedious, but I started gleaning some common tricks of the trade. I gathered more tools as needed: a good wire stripper, a cheap digital multimeter, etc.
Vintage audio repair is a world where there’s a lot of folk knowledge, and the internet is a perfect place to learn. I found an old-school internet forum where friendly people love to talk about amplifier repair and help others, and I just started reading, hoping to soak up enough knowledge to take the first steps with the 330B.
Here’s an example of something I never would have thought of, that was immensely helpful for this project: For many components, the orientation of the component’s pins or leads in the circuit is crucial. If you replace a part and get the orientation wrong, you can easily destroy the component, the circuit, or both. So, before replacing components in the unit, mark the old ones with a dot that faces the front of the unit. This way, when you start putting the new part in, you can always reference the orientation of the old part you took out, and confirm that you’re putting the new part in with the exact same orientation.
In old electronics, electrolytic capacitors are the first components to fail. They start drying out after 30+ years. And when they fail, depending on how the circuit is designed, they can cause problems that destroy other parts of the circuit, or your speakers. So, I knew I needed to replace those, and there were dozens inside the 330B.
There are lengthy debates on the internet about which capacitors to use in audio gear. Capacitors are like rechargeable batteries, except they store energy for a shorter time. One part of a circuit can charge up a capacitor, and another part can draw it down. And the capacitors in an amplifier have a big impact on the sound of the amp, so some folks become very opinionated about them.
I started building a list of replacement components to order, checking and double-checking everything with my internet buddies. The 330B is a popular model for refurbishing because it’s not too expensive, it has withstood the test of time pretty well, and a lot of people like the sound of it. So, people on the internet had already answered a lot of questions I had.
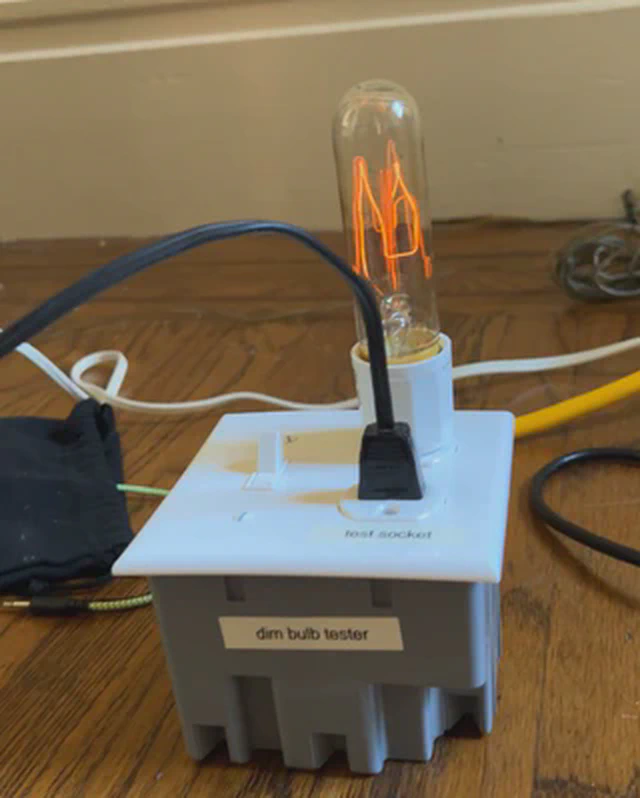
A dim bulb tester can detect shorts without destroying the unit under test
Once I got a parts list together, there was one more thing I needed before I could start the project: a dim bulb tester. This is a device with a light bulb attached that lets me safely detect shorts without destroying the unit. When the amplifier has no shorts, the bulb burns dimly when the amplifier is powered on. When there’s a short, the bulb burns brightly. And, importantly, the brightly burning bulb absorbs damaging excess current from the rest of the shorted-out circuit, preventing the unit from immediately going up in smoke when there’s a short. The dim bulb tester took an hour to build with parts from Amazon.
Next, I started slowly going through the unit to replace capacitors, starting with the power supply. It was slow but very satisfying work, and I kept testing the unit after every few changes. If there was going to be a problem, I wanted it to be relatively isolated.
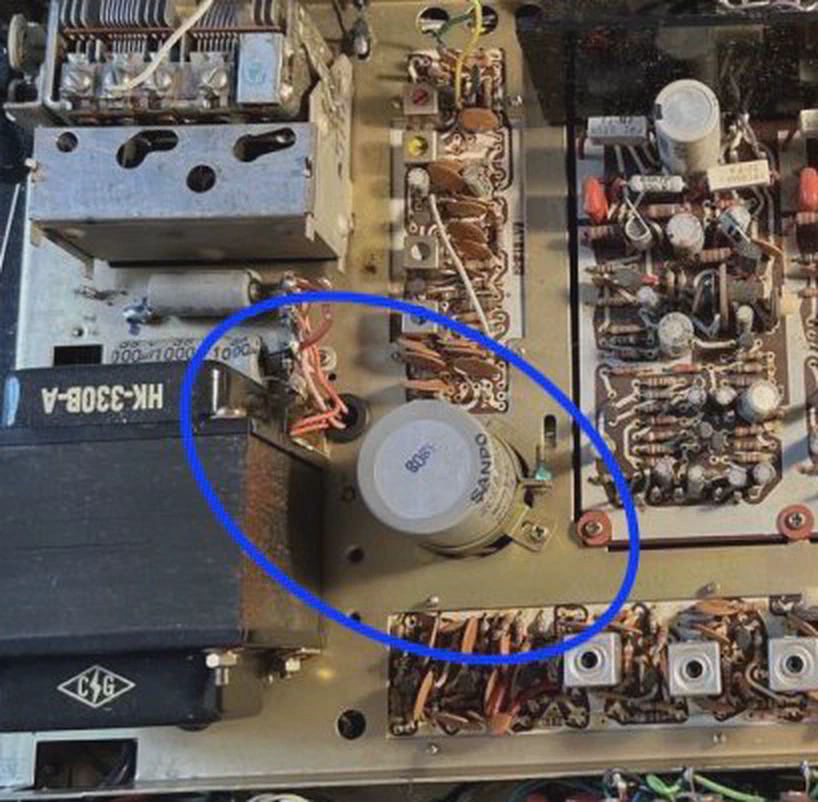
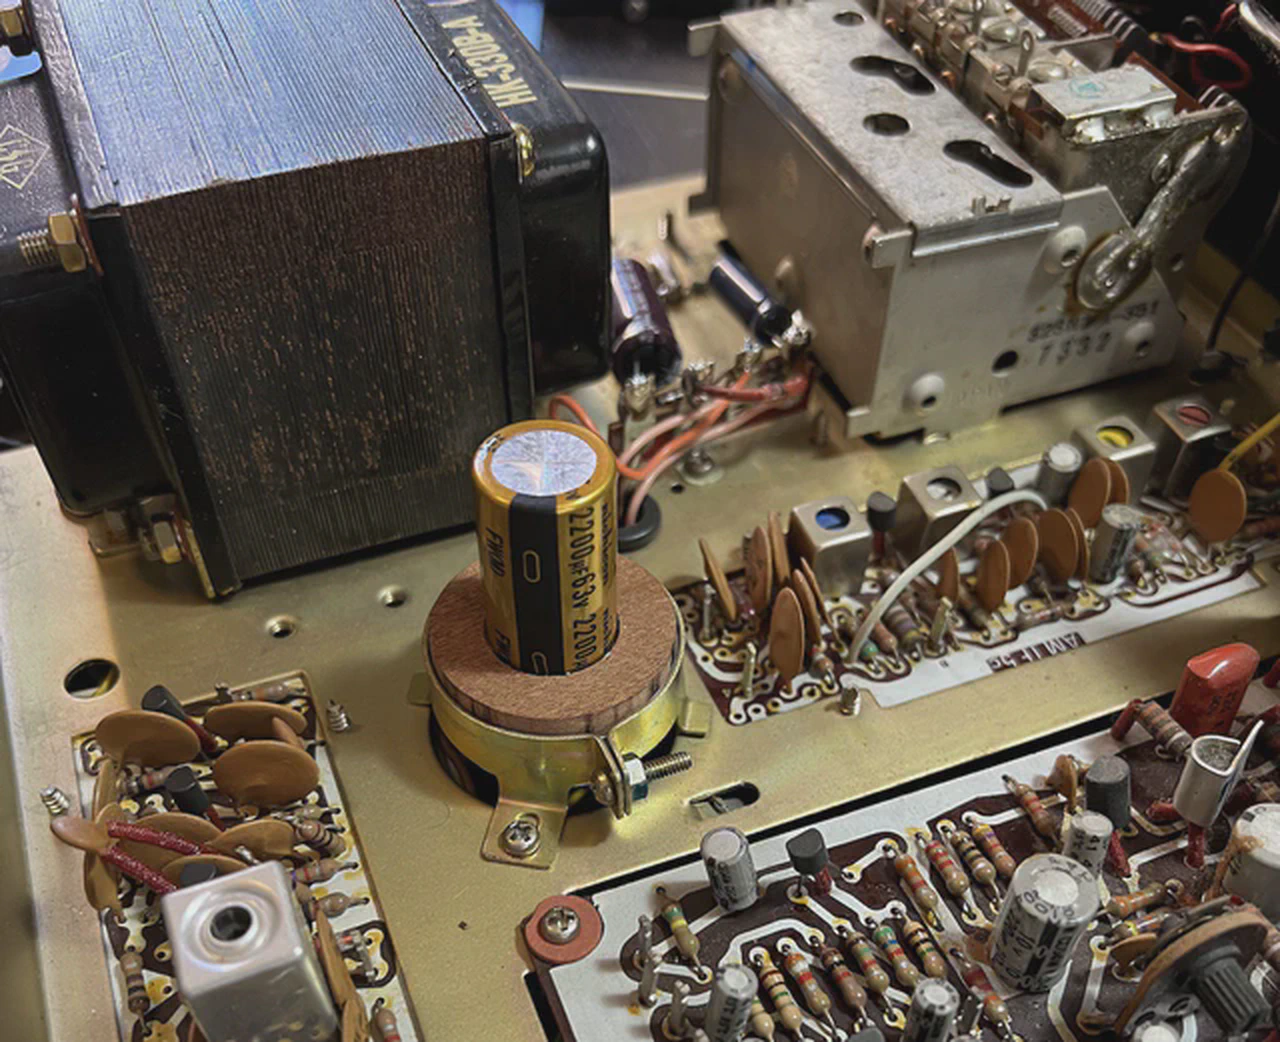
Eventually I came around to the largest capacitor in the unit: a 2200µF 63V filter capacitor. The filter capacitor helps smooth out the AC signal coming from the wall outlet so it can be transformed into beautiful sound further downstream.
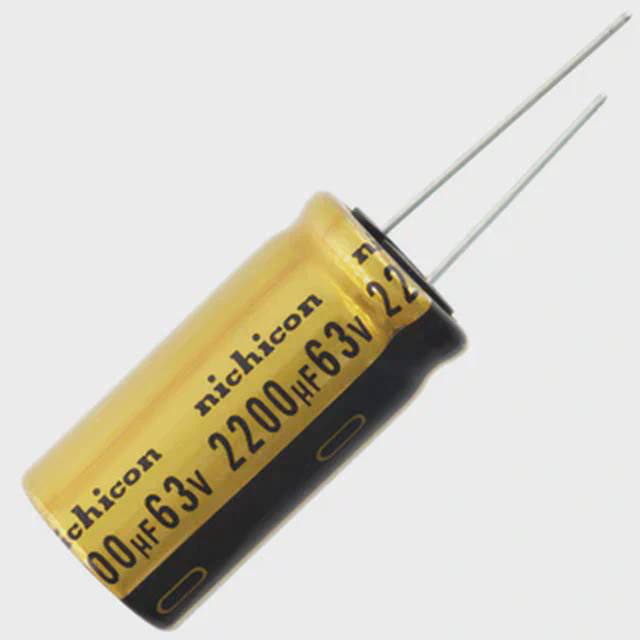
The Nichicon UFW1J222MHD
For its replacement, I found the $3 Nichicon UFW1J222MHD. Capacitors today are a lot smaller than they were in the 1975, so this new capacitor needed a cylindrical adapter to fit into the original capacitor’s socket. I went to my friend Philip Wood, a woodworker with a beautiful wood shop and a very steady hand:
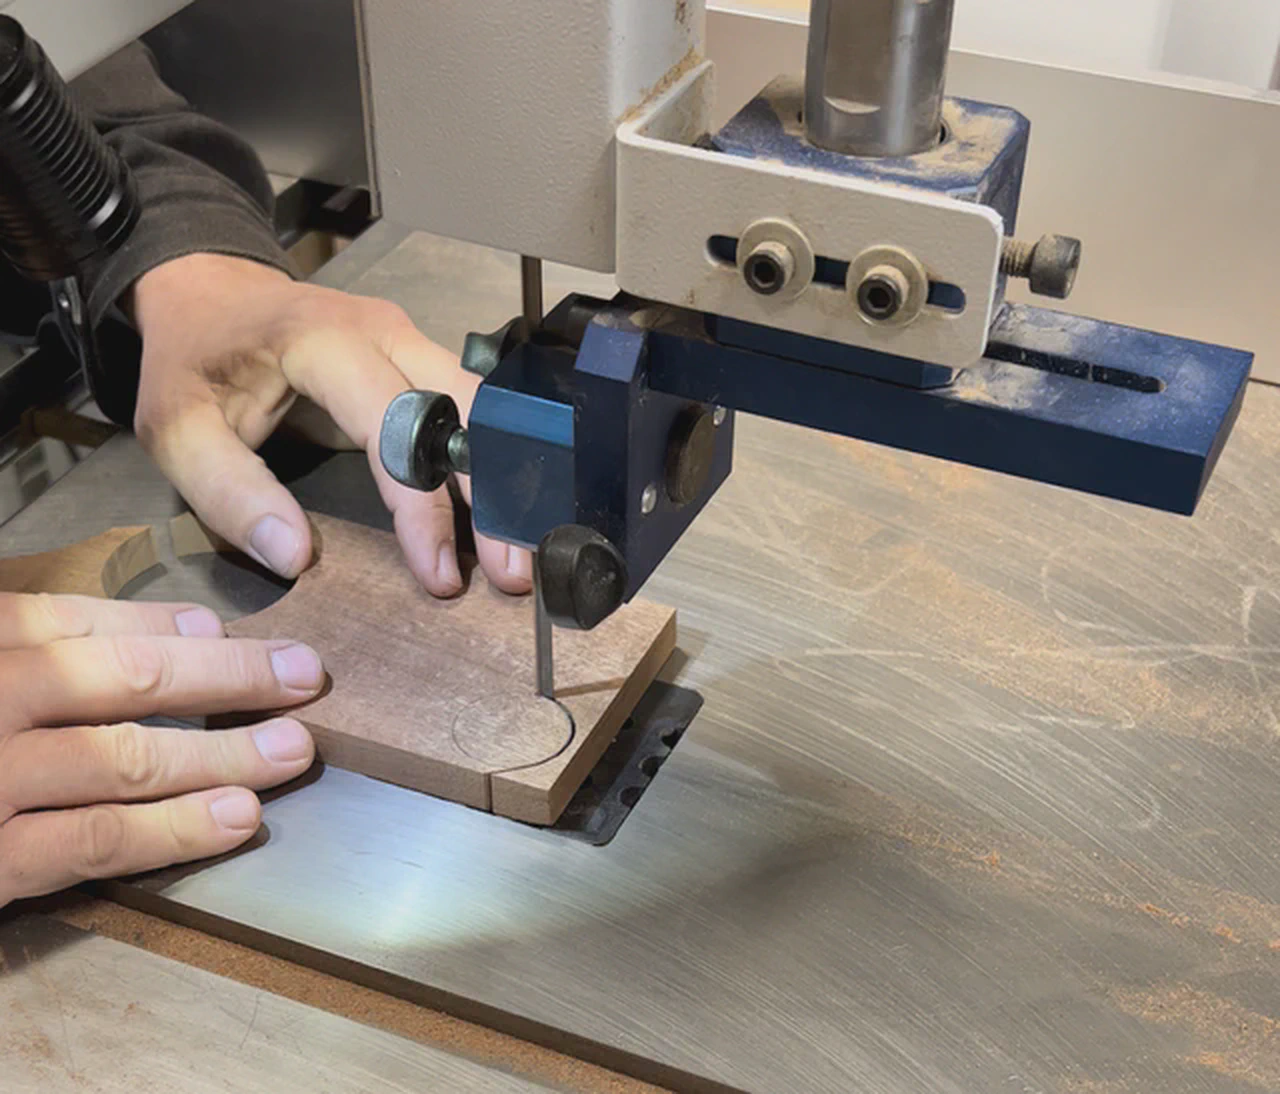
After about 10 minutes of work, we ended up with this:
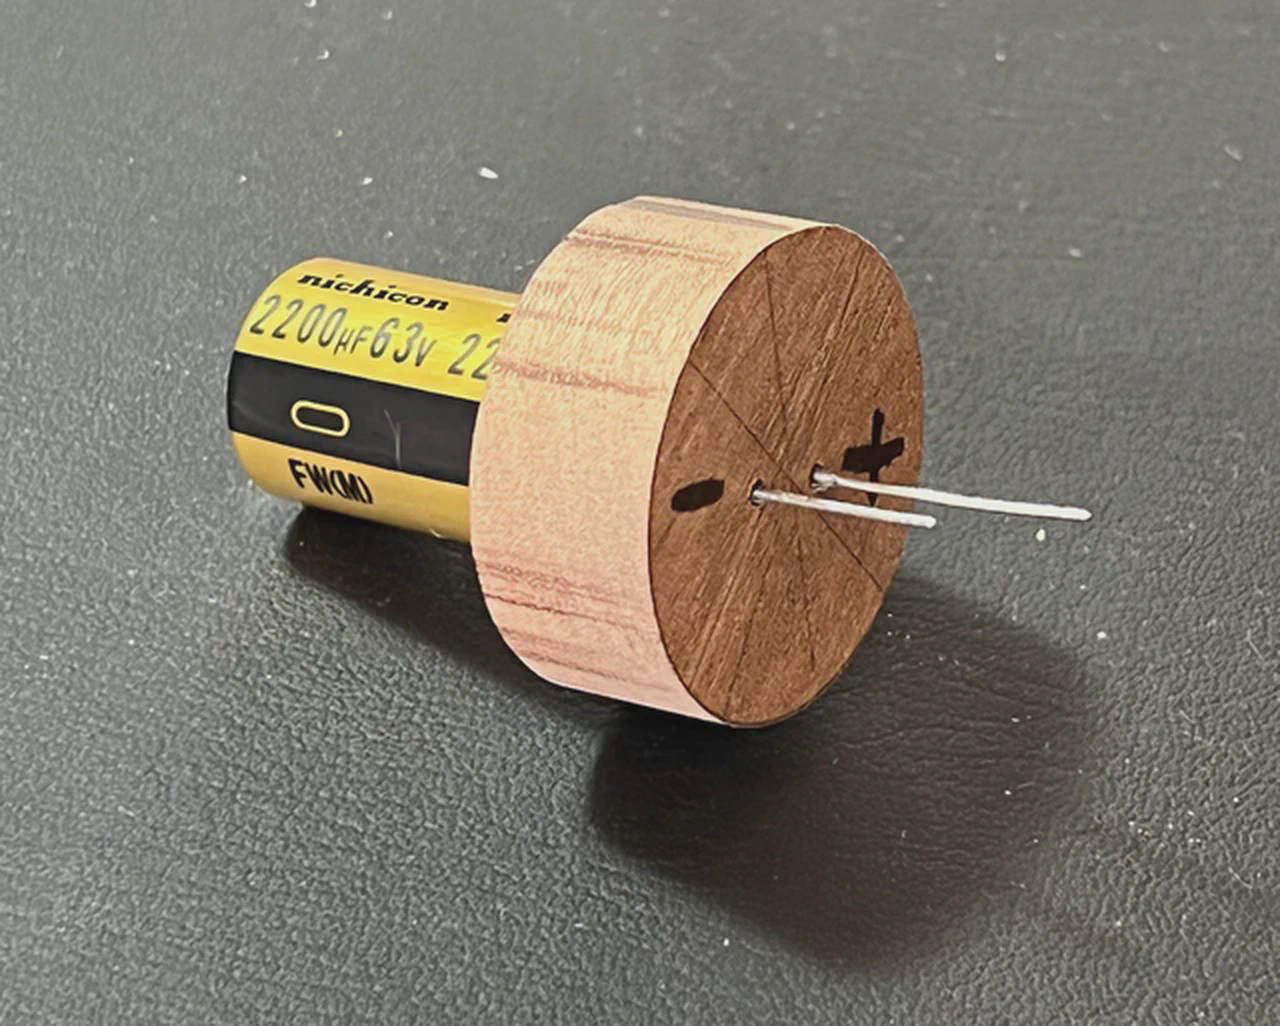
And here it is in the receiver, looking so cute in its wooden skirt!
Once that was done, I moved on to the audio signal path, and I replaced another 40 or so smaller capacitors on the preamp and amplifier circuit boards. This took one long afternoon, and I definitely burned my fingers on at least one hot capacitor.
The final step in the project was to bias the amplifier, to bring it into balance. Every time you change a component in an AC circuit like this, the operating characteristics of the circuit change subtly. And the system needs to hang together just right in order to sound good. So, just as an instrument needs to be tuned, amplifiers need to be biased by adjusting a few internal knobs (variable resistors) provided for this purpose.
Biasing balances out the power level of the amplifier so it doesn’t distort, and ensures that the output transistors are operating in the linear part of their response curve.
After biasing, the system sounds amazing. Sweet, warm, big. It’s not for any particular technical trait that I love this stereo. It just feels good to listen to. It feels right. If you sit right between the two speakers, it feels as though you are inside the music. It seems to have a soul to it, that shines forth with every listen. And I think that’s why it’s been in my life all this time.
Thank you, Don, for having excellent taste in stereophonic music centers.
Resources for learning electronics
Theory videos:
- How Capacitors Work
- Intro Circuits Class Lectures — components — Ohm’s Law — etc
(1 2 3)
Technique videos:
- YouTube: Mr. Carlson’s Lab channel — especially good for diagnosis & repair
- YouTube: w2aew’s channel — good on applied theory
- Must-have tools for working on vintage audio gear
- How to solder
- How to desolder with various desoldering tools
- Cleaning your soldering iron
- How to repair damaged PCB traces
- How to use Deoxit and other electronics cleaners
Component selection:
- AudioKarma’s solid state audio forum
- I wrote up a page about capacitor selection